

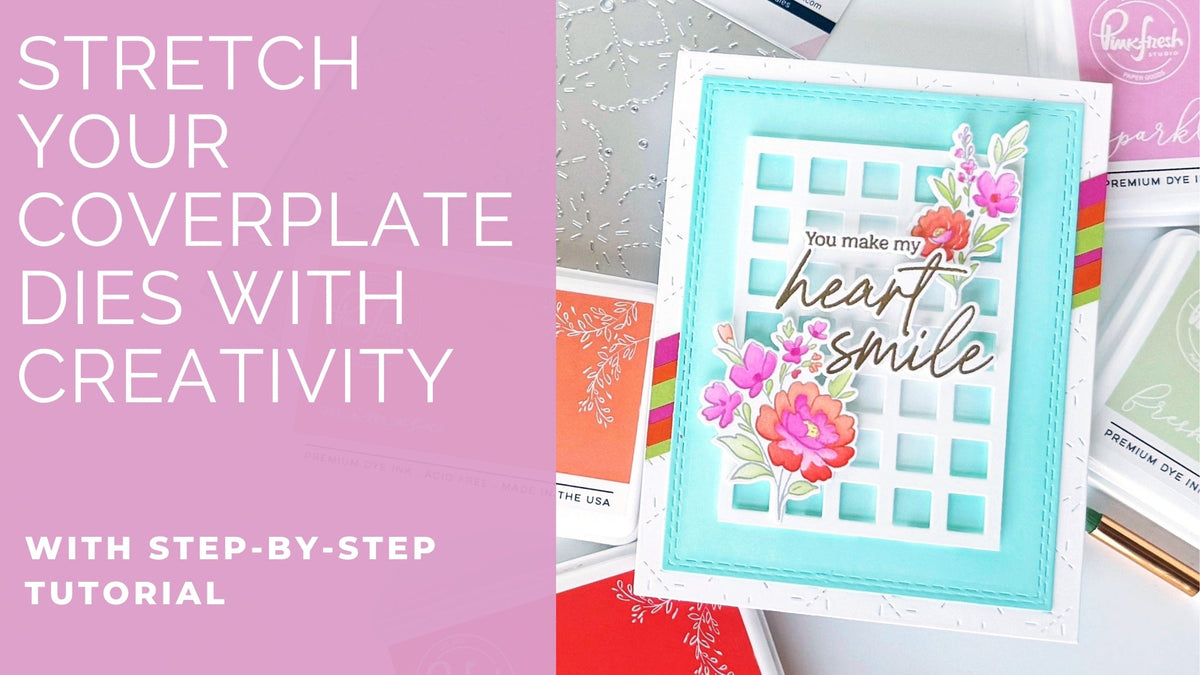
Hi everyone! Kathleen here, and today I’m sharing a card I recently created during a YouTube Live on the Pinkfresh channel.
This design is filled with a few of my favorite tips and techniques for adding interest and getting more from your supplies. I used non-traditional colors for the florals and leaves to give them a fresh look, added texture by dry embossing with press plates, repurposed leftover foil with the Solid Hot Foil Plate, and created dimension by layering simple shapes and tucking die cuts throughout the design. Let’s take a closer look at how it all came together!
If you’re not familiar, we go live on our YouTube channel every Tuesday at noon CT for a fun, 60-minute cardmaking session—complete with amazing inspiration, lively chat, and of course, giveaways! So don't miss out!
If you missed the Live session, you can watch the replay below (or click to watch full screen):
*Disclaimer: All products used are linked below as clickable images. If a product isn’t listed, it’s been discontinued.


Let's take a look at how you can recreate it:
-
Card Base:
- (1) A2 top or side-folding from white cardstock
- Dry emboss the right side with the Floral Daydream press plate.
- Ink blend the front lightly with Ballet Slipper, starting at the top & fading it out to white toward the bottom.
- (1) A2 top or side-folding from white cardstock
-
Floral Daydream + Sentiment:
- Hot foil the Floral Daydream image press plate + one sentiment on white cardstock using Prism foil.
- Hot foil the leftover foil with the Solid Hot Foil Plate on white cardstock & set aside.
- Ink blend the hot foiled outlines with the coordinating stencils:
- Stencil 1: Slumber (leaves; fade out toward the tip); Peach Fuzz (flower centers)
- Stencil 2: Sapphire (leaves); Peach Fuzz (flower centers)
- Stencil 3: Stargazer (leaves); Ballet Slipper (square petal area)
- Stencils 4+5: Soft Lilac (heavier in the center, fade out to white toward the outside)
- Stencil 6: Candy Violet (heavier in the center, fade out to white toward the outside)
- Die cut the ink-blended & solid foiled florals and the sentiment with the coordinating die.
- Stack the sentiment with one blank piece. Then die cut another blank from Silver Glitter Cardstock & adhere it slightly offset to the back of the hot-foiled sentiment. Set aside.
-
Single-Stitch Rectangles:
- Die cut the 4th and 5th-largest Single Stitch Rectangles dies from white cardstock.
- Adhere the larger piece centered onto the card front with regular adhesive. Tip: Apply adhesive only to the center area so you can tuck flowers underneath the edges later.
- Adhere the smaller rectangle centered on top using foam adhesive.
-
Assembly:
- Add a mix of ink-blended and solid hot-foiled florals to the card, tucking some of the pieces behind the rectangles for added dimension.
Tip: Trim away portions of larger floral pieces that will be hidden, then reuse those cutoffs elsewhere on the card to fill small gaps and add fullness. - Adhere the stacked sentiment onto the lower half of the small rectangle.
- Add a mix of ink-blended and solid hot-foiled florals to the card, tucking some of the pieces behind the rectangles for added dimension.
- Embellish to your liking, e.g. using Clear Drops.

Make sure to watch the YouTube Live replay where I shared more ideas for creating backgrounds using the Fragrance Notes set (but of course you can use these ideas with pretty much any product suite in your stash)!
And as always, we’d love to see what you create—don’t forget to tag us on social media (@pinkfreshstudio and @cardsandconfetti) so we can admire your amazing work.
Thanks so much for stopping by today & I hope you feel inspired to try these ideas!
Recommended Products









Leave a comment
All comments are moderated before being published.
This site is protected by hCaptcha and the hCaptcha Privacy Policy and Terms of Service apply.